This article will guide you to write first C++ program using Visual Studio 2008 and explain you step by step on how to create your first C++ program.
Follow the following simple steps and you should be able to create your first c++ program without any issues:
Follow the following simple steps and you should be able to create your first c++ program without any issues:
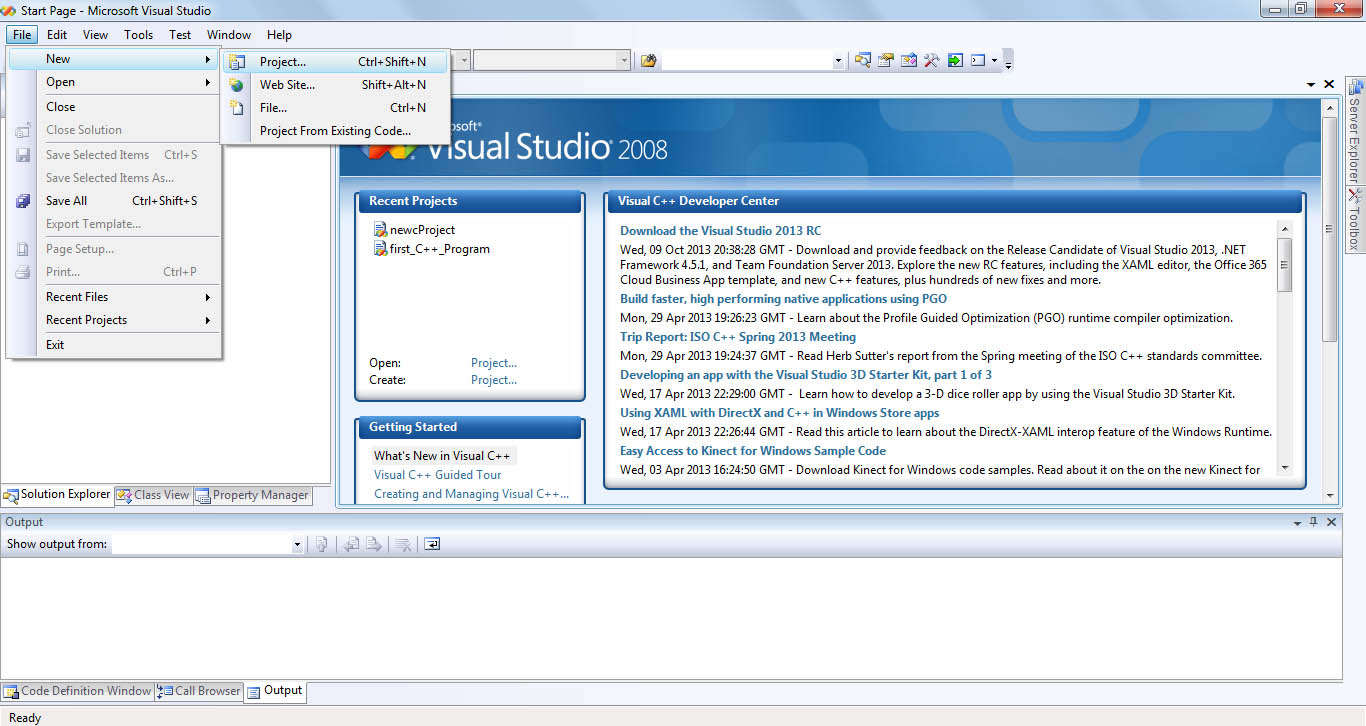
- Open the Microsoft Visual Studio 2008 application. Click on File > New > Project as shown below:
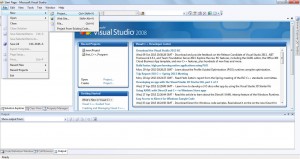
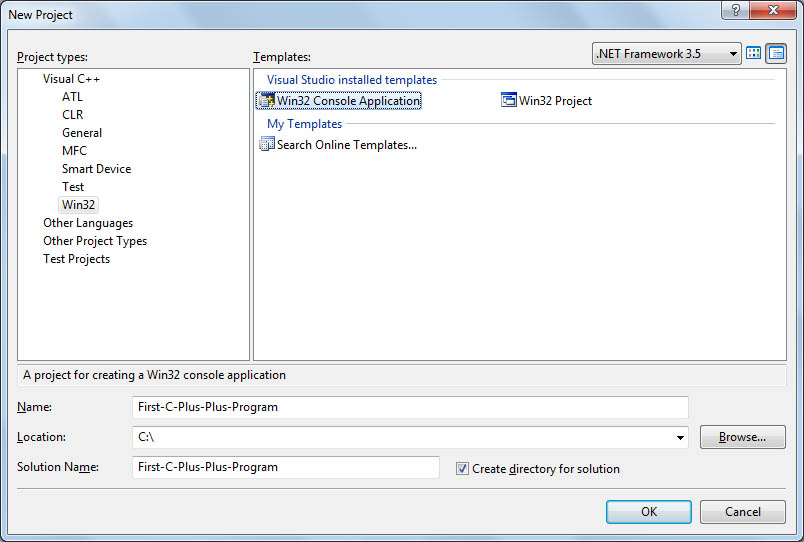
- On performing the above steps, following window will be displayed.
Under “Project types:” select Visual C++ > Win32.
At the right hand side, under Templates Select Win32 Console Application.
Enter the Project Name in the Name field, Location and the the Name of the Solution as desired and click on OK button.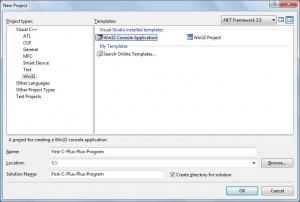
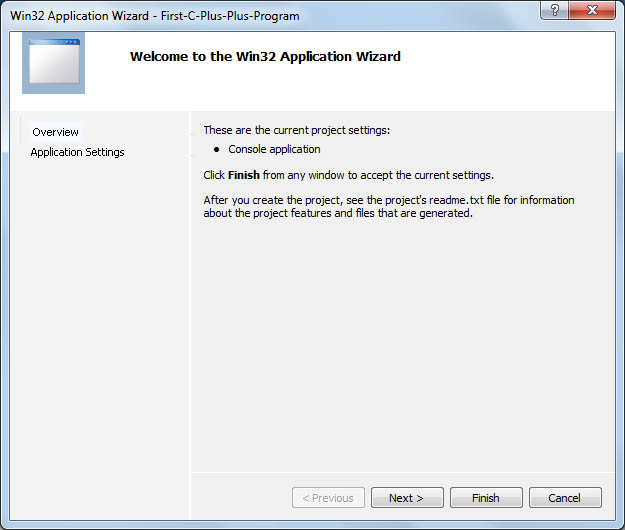
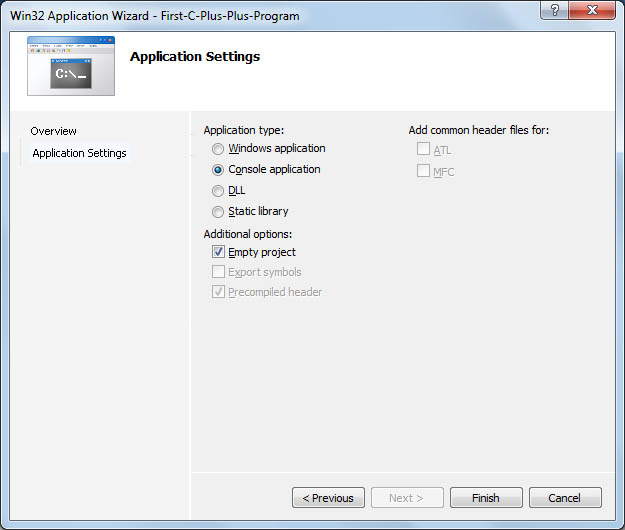
- On performing the above step, following window will be displayed:
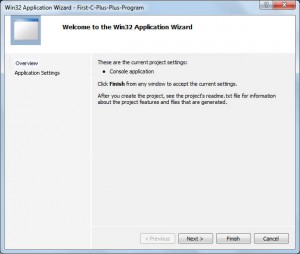 Click on Next Button. Select Console application as Application type and under Additional options, select Empty project and click Finish.
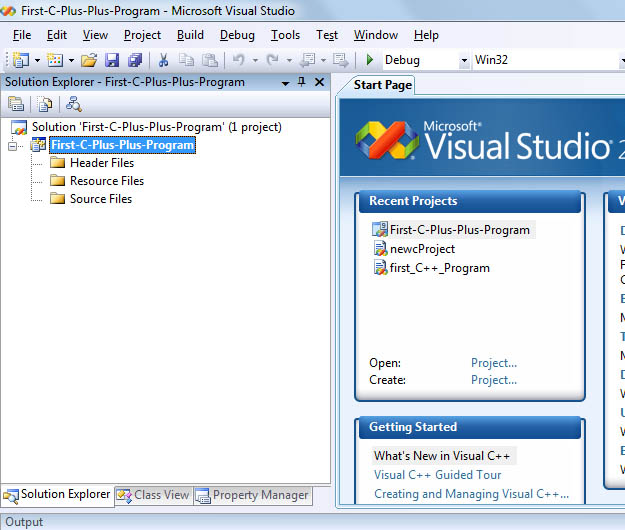
- On clicking Finish button, Project will be created and the same can be seen in Solution Explorer as below:
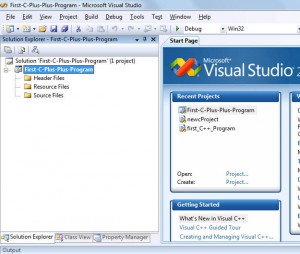 If you do not find Solution Explorer, then click on View > Solution Explorer or Press Ctrl + Alt + L.
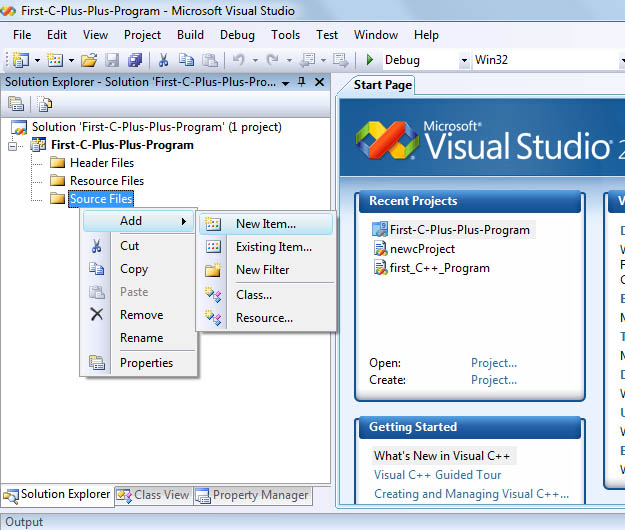
 - Next step is to right click on Source Files folder under Project Name in Solution Explorer and select Add > New Item.
Select C++ File (.cpp).
Enter the name of file as desired and Click on Add button.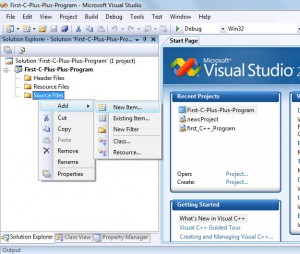

- On performing the above step, file named first-c-plus-plus-file.cpp will be created under Source Files folder.Now, type the following code in the file first-c-plus-plus-file.cpp and save the file (ctrl + s).
- We are done with writing our first C++ program. Our next step is to compile and run the program and check the output.
Now, Press F7 keyboard button or select Build > Build Solution.In the output tab (View > Output), you will see the below message if everything goes fine without any errors. - The last step is to run the program and check the output in the output screen.
Click on Debug > Start Without Debugging or click Ctrl + F5
Congratulations! You have successfully created your first C++ program using Microsoft Visual Studio 2008. For other versions of Microsoft Visual Studio (e.g. Microsoft Visual Studio 2012), steps should be similar to the one mentioned above. So what are you waiting for? Go ahead and create your first C++ Program and share your valuable feedback. 
0 comments:
Post a Comment